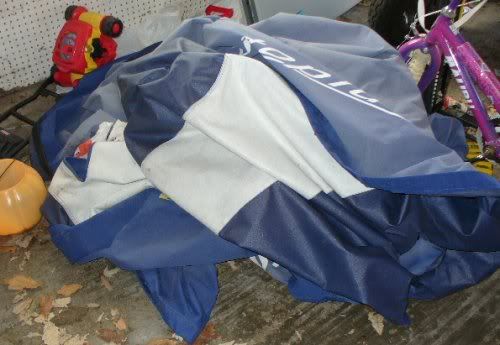
So, my brother in law asked me late LAST summer if I could fix his boat cover. Of course, I said yes. Originally, the plan was for me to bring my sewing machine outside and fix it out on the back porch. Needless to say, about a week after he dropped off the cover, it got cold and there was no way I was going to sit outside and freeze my ass off repairing this cover. So, there it sat until it got warm last weekend.
Initially, I tried looking for information on the web as to how to go about repairing a boat cover, since I really had no idea where to start. I found there wasn't a whole lot of information out there, and that's way i'm going to document it a bit here.
First, materials.
For fabric, I used 500 deiner Cordura that I purchased from
SeattleFabrics.com I bought 1 1/4 yard, but I didn't even come close to needing that much.
I used a size 14 Schmetz microtex needle.
Just regular poly/cotton thread.
I used a roller foot, but I don't think that's really necessary.
I'm going to reccomend that my BIL spray some waterproffing spray to finish the seams.
I would like to point out a few helpful tips to any one who is thinking of taking on a project like this:
-Be aware of where the patch job is. If it's around the edge or along an area that has access to the tear, you'll be ok. YOU ARE NOT GOING TO TO BE ABLE TO FIT ALL THIS BOAT COVER ON THE BED OF YOUR MACHINE!! In other words, if there is a rip in the center of the cover, you'll probably need the services of a professional.
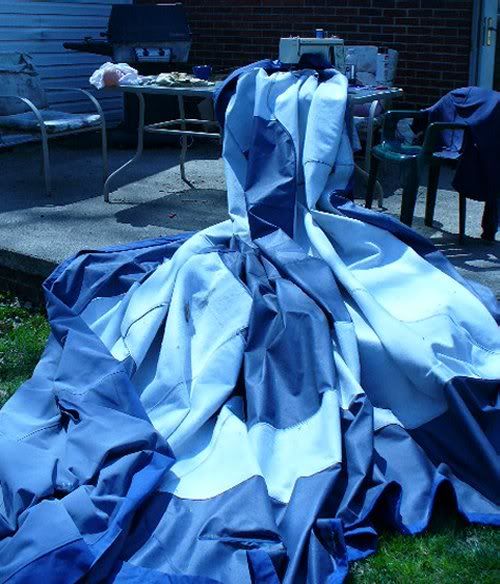
-You really can't move the boat cover while you're sewing. It's heavy and akward. You are much better off moving your machine as much as you can.
-Have plenty off needles ready. You're going to need them.
-Have plently of space available (see pic above).
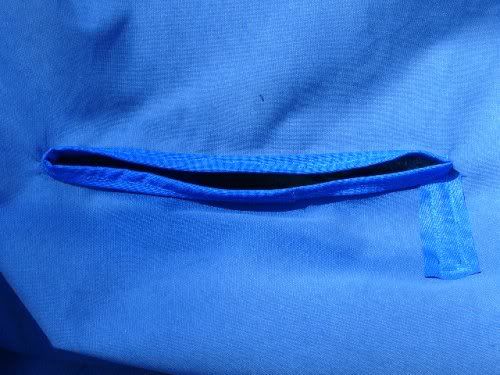
This particular boat cover had two tears in it. Both tears needed to be patched. First, I had to remove the binding from the opening for the cleat. This was the easy part.
Patching was pretty easy too. I zig-zaged over the rip to close it a bit. Then I just cut two squares to fit over the rip. I sandwiched the boat cover between the two squares and then sewed around the rip.
Once that was done, then it was time to put the binding back on. What a pain in the ass! I cut strips 2 1/2 in wide. I had to narrow them a bit to about 2 inches, but that's a good place to start. Also, while I call these strips bias, they're not really, and I didn't cut them on the bias. I wasn't sure if it would matter with coated nylon.
As I said before, the boat cover doesn't easly move. The best you can do is sew a few inches and move your machine. OR you can sew a few inches and completely turn the boat cover over. This takes a bit of strength. Don't give this job to your grandma! lol

This took me about 4 hours total to do. And the finished result looks a bit crappy because the new nylon doesn't match the worn and faded boat cover. When I told my BIL this, he said he didn't care how it looks, he needed it to be functional. So, he got functional.
Anyone who has a bit of patience and a good mechnical machine could probably do this. It's not a easy job though.


No comments:
Post a Comment